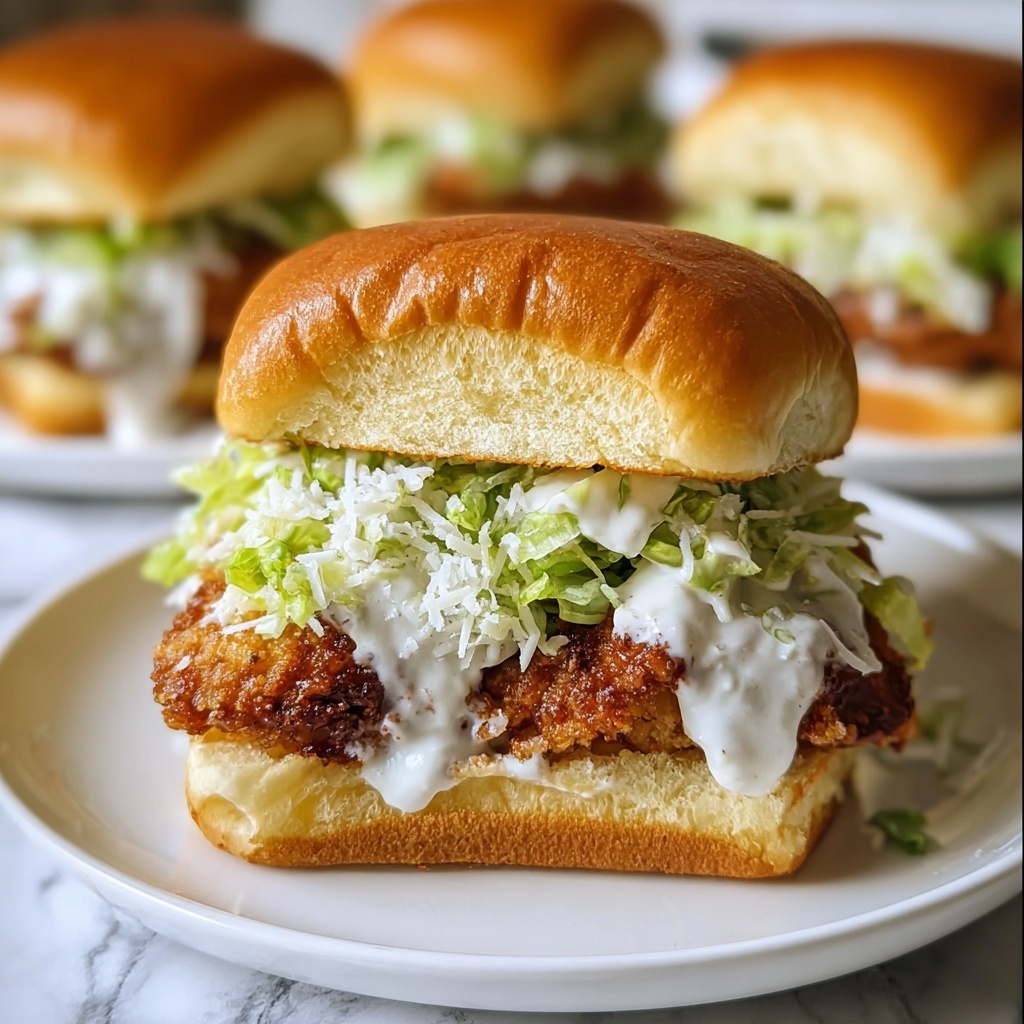
If you’re craving a sandwich that’s bursting with flavor, texture, and that heavenly crunch, then you absolutely need to try this Crispy Chicken Caesar Sandwich Recipe. It brings together juicy, tender chicken coated in a golden, crispy crust with the fresh, crisp Romaine lettuce and tangy Caesar dressing all snugly tucked inside a perfectly toasted roll. Every bite is a little celebration of crispy, savory goodness and creamy, zesty Caesar that’s just impossible to resist.

Ingredients You’ll Need
These ingredients may look straightforward, but each one plays a vital role in creating the perfect balance of crispy, creamy, and fresh flavors in this sandwich. The combination of spices, panko breadcrumbs, and Parmesan cheese gives the chicken its irresistible crunch and depth, while Romaine and Caesar dressing add refreshing contrast and richness.
- 4 boneless, skinless chicken breasts: The star protein that becomes juicy and tender after pounding and frying.
- 1 cup all-purpose flour: Helps create a light coating for that first layer of crispiness.
- Salt, to taste: Enhances every ingredient’s natural flavor when seasoned properly.
- Black pepper, to taste: Lends a mild heat and earthiness to the crust.
- 1 teaspoon garlic powder: Adds subtle savory notes to the batter and breading.
- 1 teaspoon onion powder: Gives a mellow sweetness that balances the other spices.
- 1 cup buttermilk: Tenderizes the chicken while adding moisture and slight tang.
- 2 cups panko breadcrumbs: Creates that signature light and crispy texture for the coating.
- 1/2 cup grated Parmesan cheese: Boosts flavor with its nutty, salty punch and helps crisp the breadcrumb crust.
- 1/4 cup olive oil, for frying: Used to perfectly brown the chicken with a rich flavor.
- 4 large sandwich rolls, split: The sturdy but soft vehicle for the glorious fillings inside.
- 1 cup Romaine lettuce, shredded: Adds fresh crunch and vibrant color to balance the fried chicken.
- 1/2 cup Caesar dressing: Brings tangy creaminess that ties all the flavors together beautifully.
- 1/4 cup shaved Parmesan cheese: A final sprinkle to enhance every bite with extra cheesy goodness.
- 2 tablespoons melted butter: Richly flavors the sandwich rolls when brushed on.
- 1 clove, minced: Mixed with the butter to give the bread a delicious garlic aroma.
How to Make Crispy Chicken Caesar Sandwich Recipe
Step 1: Prep Your Oven and Chicken
Start by preheating your oven to 400°F (200°C), which will give your chicken that final finish after frying. Then, gently pound the chicken breasts to an even thickness using a meat mallet or rolling pin. This step ensures they cook evenly and stay juicy throughout.
Step 2: Prepare the Seasoned Flour
In a shallow dish, whisk together the flour, salt, black pepper, garlic powder, and onion powder. This seasoned flour creates the foundational flavor and texture for the chicken’s coating, so be generous and thorough.
Step 3: Set Up the Breading Stations
Pour buttermilk into another dish—this will tenderize the chicken and help the breadcrumbs stick perfectly. In a third dish, mix your panko breadcrumbs with the grated Parmesan cheese, the secret behind that satisfying crunch and extra burst of flavor.
Step 4: Dredge and Coat the Chicken
First, dredge each chicken breast in the seasoned flour, shaking off any excess to avoid clumpy batter. Then dip it into the buttermilk, letting the extra drip away before coating it thoroughly in the panko and Parmesan mixture. This triple-step coating is the key to the sandwich’s signature crispy crust.
Step 5: Fry Until Golden
Heat your olive oil in a large skillet over medium heat and carefully fry each breast for about 4 minutes per side, or until beautifully golden and crisp. Don’t rush this part; the golden crust locks in moisture for that perfect juicy bite inside.
Step 6: Finish Cooking in the Oven
After frying, transfer the chicken breasts to a baking sheet and bake in your preheated oven for about 15 minutes until fully cooked through. This ensures the chicken is tender inside and safe to eat, while maintaining its crisp coating.
Step 7: Prepare the Garlic Butter Rolls
Mix melted butter with minced garlic, then brush this mixture generously on the cut sides of your sandwich rolls. Pop them into the oven for about 5 minutes until golden brown and toasty, giving you a buttery, fragrant base that complements the savory chicken perfectly.
Step 8: Assemble the Sandwich
Place each crispy chicken breast on the bottom half of the toasted roll. Layer on shredded Romaine lettuce, drizzle with creamy Caesar dressing, and sprinkle shaved Parmesan cheese on top. Finally, crown your masterpiece with the top half of the roll and get ready to enjoy a symphony of textures and flavors.
How to Serve Crispy Chicken Caesar Sandwich Recipe

Garnishes
To lift your Crispy Chicken Caesar Sandwich Recipe to the next level, add a few extra garnishes like fresh cracked black pepper, a sprinkle of extra Parmesan, or even a drizzle of lemon juice for brightness. These small additions make your sandwich feel restaurant-worthy and personalized just for you.
Side Dishes
This sandwich pairs wonderfully with fresh, light sides like crisp carrot sticks, a handful of kettle-cooked chips, or a simple tomato and cucumber salad. The contrasting textures keep the meal balanced and satisfying without feeling heavy or overdone.
Creative Ways to Present
You can serve the sandwich whole for a classic feast, or cut it in half at a diagonal for a trendy café vibe. For parties, consider making mini slider versions using small rolls for an irresistible appetizer that everyone will love. Presentation is your chance to make this dish even more special.
Make Ahead and Storage
Storing Leftovers
Wrap leftover sandwiches tightly in plastic wrap or foil and store them in the refrigerator for up to 2 days. Keep in mind the chicken crust can soften a bit, so it’s best to reheat properly to bring back that crispiness.
Freezing
If you want to freeze the chicken breasts separately, allow them to cool completely before placing in airtight containers or freezer bags. They can last up to a month frozen, ensuring you have a quick and delicious protein option ready to go.
Reheating
To reheat, preheat your oven to 350°F (175°C) and warm the chicken breasts on a baking sheet for about 10 minutes until heated through and crisp again. Toast the rolls separately and assemble the sandwich fresh to keep everything tasting lively and crunchy.
FAQs
Can I use frozen chicken breasts for this recipe?
Yes, you can use frozen chicken breasts but make sure to fully thaw them in the refrigerator before pounding and breading. This helps ensure even cooking and the best texture for the Crispy Chicken Caesar Sandwich Recipe.
What type of Parmesan cheese is best?
Freshly grated Parmesan cheese works best for the breadcrumb mixture, giving a nutty flavor and great texture. For topping, shaved Parmesan adds a beautiful look and delicious burst of flavor.
Can I bake the chicken instead of frying?
While frying gives the crispiest crust, you can bake the breaded chicken at 425°F for about 20-25 minutes until cooked through. For extra crunch, spray the chicken lightly with oil before baking.
Is buttermilk necessary? What can I use instead?
Buttermilk tenderizes and adds a tangy flavor, but if you don’t have any on hand, a mixture of milk with a splash of lemon juice or vinegar left to sit for 5 minutes works as a good substitute.
How do I make my sandwich less messy to eat?
Use sturdy sandwich rolls and evenly spread the Caesar dressing to avoid excess dripping. Adding lettuce not only tastes great but acts as a barrier to keep the bread from soaking up too much dressing.
Final Thoughts
This Crispy Chicken Caesar Sandwich Recipe is a guaranteed crowd-pleaser that balances crispy, juicy, fresh, and creamy in every bite. It’s perfect for an indulgent lunch or dinner treat that feels like a special occasion anytime you make it. Trust me, once you taste it, this sandwich will become one of your absolute favorites—so don’t wait, get cooking and enjoy every delicious moment!
Print
Crispy Chicken Caesar Sandwich Recipe
- Prep Time: 0h 30m
- Cook Time: 0h 25m
- Total Time: 0h 55m
- Yield: 4 sandwiches
- Category: Lunch
- Method: Frying
- Cuisine: American
Description
This Crispy Chicken Caesar Sandwich features tender, breaded chicken breasts fried to golden perfection and finished in the oven for extra crispiness. Layered with fresh shredded Romaine lettuce, creamy Caesar dressing, and shaved Parmesan cheese, all encased in toasted sandwich rolls brushed with garlic butter, this sandwich makes a flavorful and satisfying meal perfect for lunch or dinner.
Ingredients
Chicken and Coating
- 4 boneless, skinless chicken breasts
- 1 cup all-purpose flour
- Salt, to taste
- Black pepper, to taste
- 1 teaspoon garlic powder
- 1 teaspoon onion powder
- 1 cup buttermilk
- 2 cups panko breadcrumbs
- 1/2 cup grated Parmesan cheese
- 1/4 cup olive oil, for frying
Sandwich and Garnish
- 4 large sandwich rolls, split
- 1 cup Romaine lettuce, shredded
- 1/2 cup Caesar dressing
- 1/4 cup shaved Parmesan cheese
- 2 tablespoons melted butter
- 1 clove garlic, minced
Instructions
- Preheat Oven. Set your oven to 400°F (200°C) to prepare for baking the chicken and toasting the rolls.
- Pound Chicken. Use a meat mallet to gently pound the chicken breasts to an even thickness, ensuring they cook uniformly.
- Prepare Flour Mixture. In a shallow dish, combine the all-purpose flour with salt, black pepper, garlic powder, and onion powder.
- Pour Buttermilk. Pour the buttermilk into a second shallow dish for dipping the chicken.
- Mix Breadcrumbs. In a third dish, mix together the panko breadcrumbs and grated Parmesan cheese to form the crispy coating.
- Coat Chicken. Dredge each chicken breast in the seasoned flour, shaking off excess. Dip into the buttermilk, then thoroughly coat with the breadcrumb and Parmesan mixture.
- Fry Chicken. Heat olive oil in a large skillet over medium heat. Fry each chicken breast approximately 4 minutes per side until golden and crispy. Transfer to a baking sheet.
- Bake Chicken. Bake the fried chicken breasts in the preheated oven for about 15 minutes or until fully cooked through and juicy.
- Prepare Garlic Butter. In a small bowl, combine the melted butter and minced garlic for brushing.
- Toast Rolls. Brush the cut sides of the sandwich rolls with the garlic butter mixture. Place on a baking sheet and toast in the oven for about 5 minutes until golden brown.
- Assemble Sandwiches. Place a crispy chicken breast on the bottom half of each toasted roll.
- Add Lettuce. Top the chicken with a generous helping of shredded Romaine lettuce for crunch and freshness.
- Dress and Cheese. Drizzle Caesar dressing over the lettuce and sprinkle the sandwich with shaved Parmesan cheese for flavor.
- Close Sandwich. Place the top half of the toasted roll over the filling to complete your sandwich.
Notes
- For extra crispiness, ensure the oil is hot before frying the chicken.
- You can substitute sandwich rolls with ciabatta or brioche buns for different flavors.
- To reduce calories, consider baking the chicken without frying first and brushing with oil instead.
- Use gluten-free flour and breadcrumbs to make this sandwich gluten-free.
- Feel free to add sliced tomatoes or bacon for added flavor variations.


